Why You Need This Checklist
What if the patio of your dreams simply doesn't exist at your local home improvement store? You've walked those aisles, seen the same square and rectangular pavers in the same boring sizes, and wondered if there's a better way. There is — and DIY Creators just proved it in spectacular fashion.
Here's the frustrating truth most homeowners face: store-bought pavers are designed for the average yard, not yours. They're the wrong shape, the wrong size, and they look exactly like every other patio on the block. So you either settle, or you pay a contractor a small fortune to custom-fabricate something. Neither option feels right, and that nagging feeling that your outdoor space could be so much better just doesn't go away.
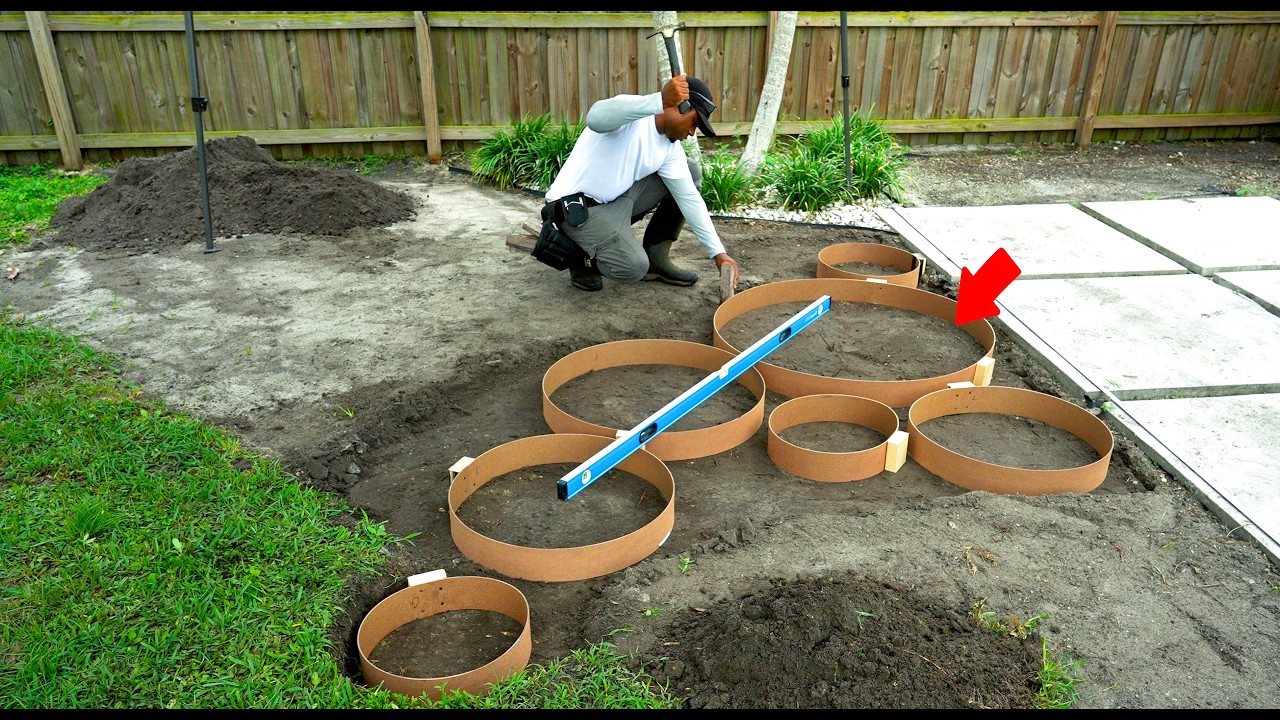
Now picture this instead: a winding path of seven unique circular pavers, each a different size, with a rich exposed aggregate texture that catches the light and turns heads. Pavers that fit your exact layout, sit flush with your existing concrete, and look like they were professionally installed. That's exactly what DIY Creators built — by hand, solo, using a concrete mixer, hardboard forms, and 20 bags of 60-lb concrete. The result is a custom patio feature that no store shelf could have ever provided.
The DIY Creators channel has been building and documenting real projects for years, and this one is a masterclass in problem-solving. When the first hardboard form snapped, the process was adjusted. When the grade of the ground threw off the leveling, the solution was found on the fly. When two different batches of concrete caused discoloration, that lesson was shared openly so you don't make the same mistake. This isn't polished perfection — it's honest, experienced guidance from someone who has already poured nine similar slabs that have held up without cracking.
This checklist captures every single actionable step from that video: from ripping hardboard strips on the table saw and bending circular forms, to digging grade, setting heights, mixing and pouring concrete, removing forms, sanding edges, and grinding the surface for that gorgeous exposed aggregate finish. Every tool, every quantity, every critical warning is documented so you're not pausing and rewinding — you're just checking boxes.
If you've been staring at your backyard thinking it deserves better, this is your starting point. Download the checklist, gather your materials, and build the custom pavers your outdoor space has always deserved.
What's Inside — Preview
Every checklist item comes with actionable notes to guide you — things like "Don't forget to do this before you start," "Avoid this common mistake," or "Set a reminder for 30 days out." Nothing vague, just clear next steps.
BUILD
Rip a 4x8 hardboard panel into 4-inch-wide strips on a table saw
MEASURE
Label and cut each strip to the correct length for each planned circle size
BUILD
Cut short 2x4 pieces to use as splice blocks for connecting hardboard strip ends
BUILD
Assemble each circular form by bending the hardboard strip and screwing both ends into the splice block
BUILD
Build all seven circular forms before moving to the site — complete the full set
+ 22 more action items inside...
 ▶ Watch the source video on YouTube